728x90
<!DOCTYPE html>
<html lang="en">
<head>
<meta charset="UTF-8">
<meta http-equiv="X-UA-Compatible" content="IE=edge">
<meta name="viewport" content="width=device-width, initial-scale=1.0">
<title>Document</title>
</head>
<body>
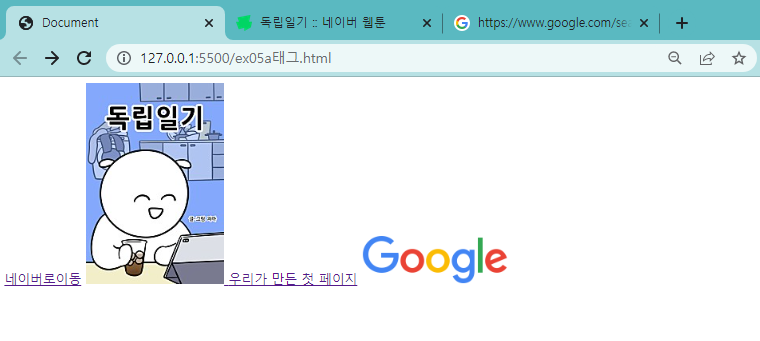
<a href="https://www.naver.com" >네이버로이동</a>
<a href="https://comic.naver.com/webtoon/list?titleId=748105&weekday=thu">
<img src="img/img2/img2.jpg">
</a>
<!--
a태그 : 특정 원하는 페이지를 요청하는 태그
(원하는 페이지로 이동하는 태그)
-->
<a href="ex01첫페이지.html">우리가 만든 첫 페이지</a>
<!-- 실습 -->
<!-- 구글이미지를 아래에 띄우고 그 이미지를 클릭했을때 구글메인페이지로 이동해주세요 -->
<a href="https://www.google.co.kr/">
<img src="https://www.google.com/images/branding/googlelogo/2x/googlelogo_color_92x30dp.png">
</a>
</body>
</html>
출력화면
실습코드
<!DOCTYPE html>
<html lang="en">
<head>
<meta charset="UTF-8">
<meta http-equiv="X-UA-Compatible" content="IE=edge">
<meta name="viewport" content="width=device-width, initial-scale=1.0">
<title>Document</title>
</head>
<body>
<!--
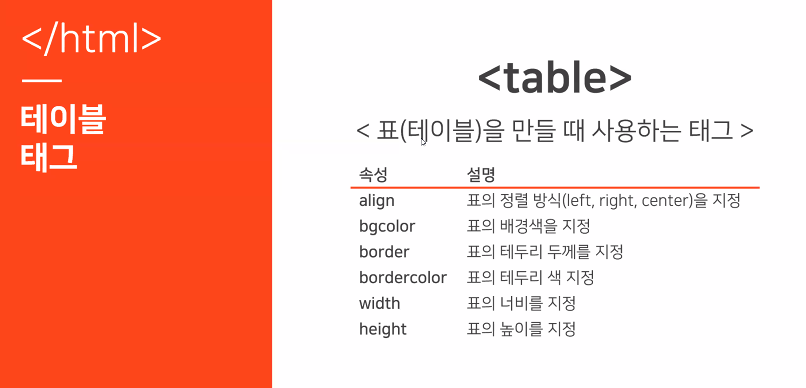
table : html에서 표를 만들 때 사용되는 태그
caption : 표의 제목을 나타내는 태그
tr : 표의 행을 만들 때 사용되는 태그
th : 표의 열 중 제목 부분에 사용되는 태그
td : 표의 열에 해당되는 태그
-->
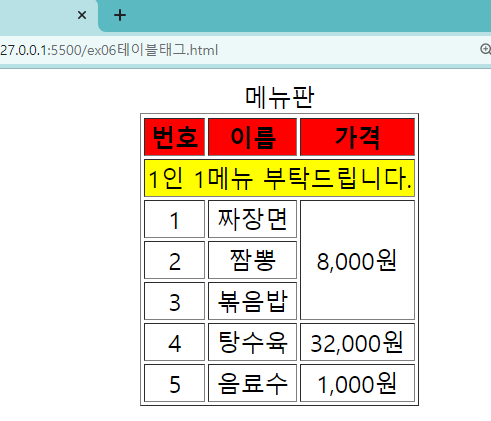
<table border="1px solid black" align="center">
<caption>메뉴판</caption>
<tr align="center">
<th bgcolor="red">번호</th>
<th bgcolor="red">이름</th>
<th bgcolor="red">가격</th>
</tr>
<tr>
<td colspan="3" bgcolor="yellow">1인 1메뉴 부탁드립니다.</td>
</tr>
<tr align="center" >
<td>1</td>
<td>짜장면</td>
<td rowspan="3">8,000원</td>
</tr>
<tr align="center" >
<td>2</td>
<td>짬뽕</td>
</tr>
<tr align="center" >
<td>3</td>
<td>볶음밥</td>
</tr>
<tr align="center" >
<td>4</td>
<td>탕수육</td>
<td>32,000원</td>
</tr>
<tr align="center" >
<td>5</td>
<td>음료수</td>
<td>1,000원</td>
</tr>
</table>
</body>
</html>결과화면
실습문제

실습 코드
<!DOCTYPE html>
<html lang="en">
<head>
    <meta charset="UTF-8">
    <meta http-equiv="X-UA-Compatible" content="IE=edge">
    <meta name="viewport" content="width=device-width, initial-scale=1.0">
    <title>Document</title>
</head>
<body>
    <table border="1px solid black">
        <caption>공부리스트</caption>
        <tr align="center">
            <th bgcolor="yellow">번호</th>
            <th bgcolor="yellow">제목</th>
            <th bgcolor="yellow">비고</th>
        </tr>
        <tr align="center">
            <td colspan="3">원하는 제목을 눌러주세요</td>
        </tr>
        <tr align="center">
            <td>1</td>
            <td>
                <a href="ex01첫페이지.html">ex01첫페이지</a>
            </td>
            <td rowspan="4">형쌤</td>
        </tr>
        <tr align="center">
            <td>2</td>
            <td>
                <a href="ex02글자작성">ex02글자작성</a>
            </td>
        </tr>
        <tr align="center">
            <td>3</td>
            <td>
                <a href="ex03볼드체">ex03볼드체</a>
            </td>
        </tr>
        <tr align="center">
            <td>4</td>
            <td>
                <a href="ex04리스트태그">ex04리스트태그</a>
                </td>
        </tr>
        <tr align="center">
            <td>5</td>
            <td>
                <a href="ex05a태그">ex05a태그</a>
            <td rowspan="2">병관쌤</td>
        </tr>
        <tr align="center">
            <td>6</td>
            <td>
                <a href="ex06테이블태그">ex06테이블태그</a>
                </td>
        </tr>
    </table>
</body>
</html>
결과화면

실습 코드
<!DOCTYPE html>
<html lang="en">
<head>
<meta charset="UTF-8">
<meta http-equiv="X-UA-Compatible" content="IE=edge">
<meta name="viewport" content="width=device-width, initial-scale=1.0">
<title>Document</title>
</head>
<body>
<!--
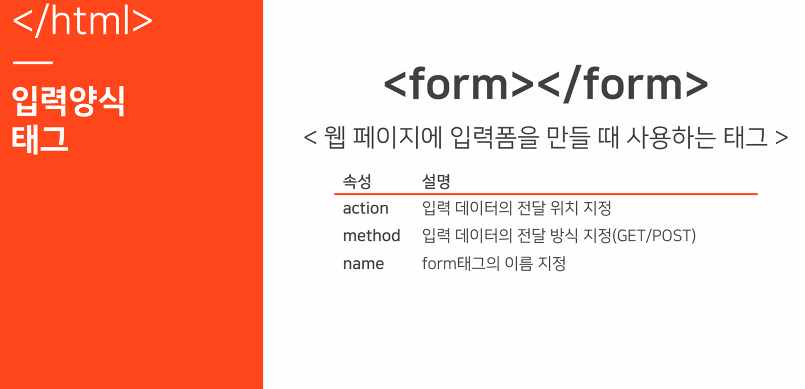
form 태그 : 입력 폼을 만들 때 사용하는 태그
action : 입력 데이터의 전달 위치 지정
method : 입력 데이터의 전달 방식 지정(GET,POST)
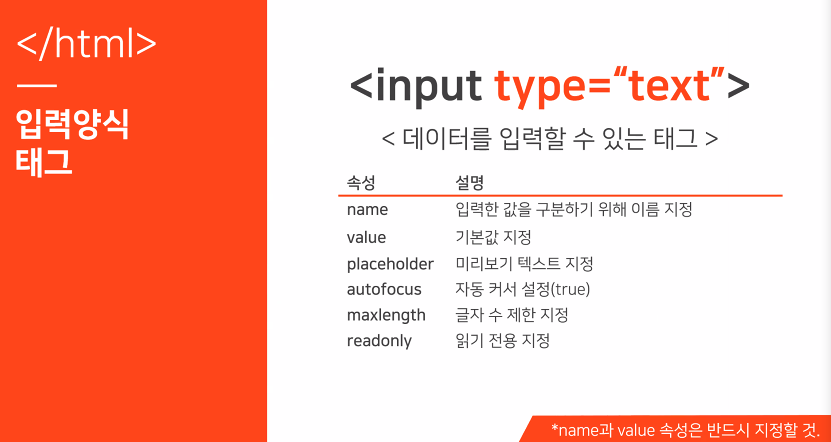
input 태그 : 데이터를 입력할 수 있는 태그
type : 어떠한 형식으로 작성할 것인지
name : 입력한 값을 구분하기 위한 이름(변수명)
value : 기본으로 작성될 값 지정
placeholder : 입력하기 위한 안내 글자
min, max : number type에서 특정 값 이상 이하를 지정
email : 이메일을 등록
readonly : input 태그를 읽기 전용(값을 고정 시킬때)
autofocus : 실행했을때 해당 input태그를 활성화
maxlength : 입력하는 글자수 제한
label 태그 : 해당 input태그를 활성화하는 태그
-->
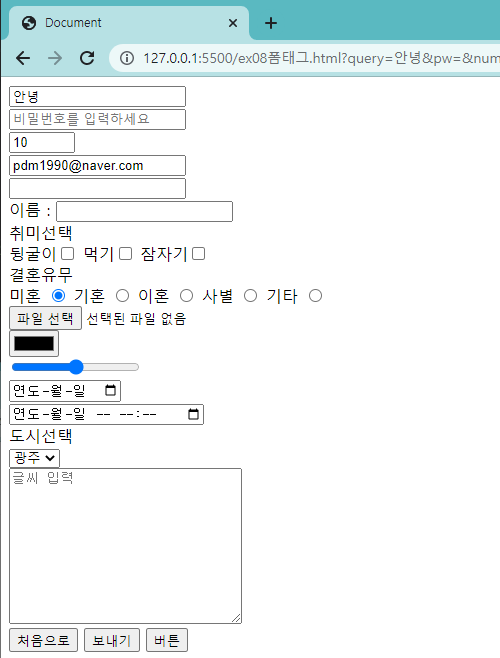
<form action="" method="">
<input required type="text" name="query" value="안녕"><br>
<input type="password" name="pw" placeholder="비밀번호를 입력하세요"><br>
<input type="number" name="num" value="10" min="0" max="20"><br>
<input type="email" name="email" value="pdm1990@naver.com" readonly ><br>
<input type="text" name="text" autofocus="true" maxlength="10"><br>
<label for="name">이름 : </label>
<input type="text" id="name"><br>
<!--
checkbox와 raio 사용시 주의할점
1. 반드시 동일한 값의 name을 사용
2. value 속성한에 값을 정의
-->
취미선택 <br>
뒹굴이<input type="checkbox" name="hobby" valu="뒹굴이">
먹기<input type="checkbox" name="hobby" value="먹기">
잠자기<input type="checkbox" name="hobby" value="잠자기"><br>
결혼유무<br>
미혼 <input checked type="radio" name="marrige" value="미혼">
기혼 <input type="radio" name="marrige" value="기혼">
이혼 <input type="radio" name="marrige" value="이혼">
사별 <input type="radio" name="marrige" value="사별">
기타 <input type="radio" name="marrige" value="기타">
<br>
<input type="file" name="file"><br>
<input type="color" name="color"><br>
<input type="range"name="range"><br>
<input type="date" name="date"><br>
<input type="datetime-local"name="datetime-local"><br>
도시선택<br>
<select name="city" id="도시">
<option value="광주">광주</option>
<option value="부산">부산</option>
<option value="서울">서울</option>
<option value="대전">대전</option>
<option value="인천">인천</option>
<option value="대구">대구</option>
</select><br>
<textarea name="text" cols="30" rows="10" placeholder="글씨 입력"></textarea>
<br>
<input type="reset" value="처음으로">
<input type="submit"value="보내기">
<!--
form태그 안에 button을 그냥 만들면 submit역할을 한다
해결책 : type=button 작성하면 순수한 버튼의 역할만 한다.
-->
<button>버튼</button>
</form>
</body>
</html>출력화면
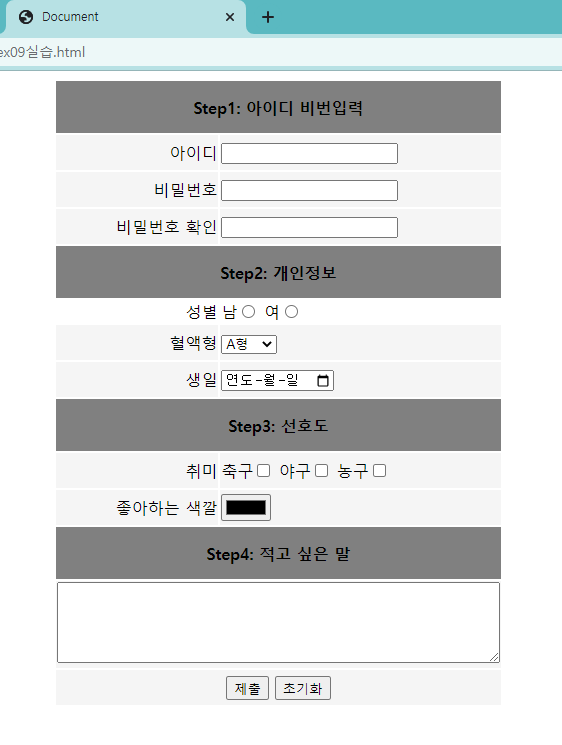
예제)
<!DOCTYPE html>
<html lang="en">
<head>
<meta charset="UTF-8">
<meta http-equiv="X-UA-Compatible" content="IE=edge">
<meta name="viewport" content="width=device-width, initial-scale=1.0">
<title>Document</title>
</head>
<body>
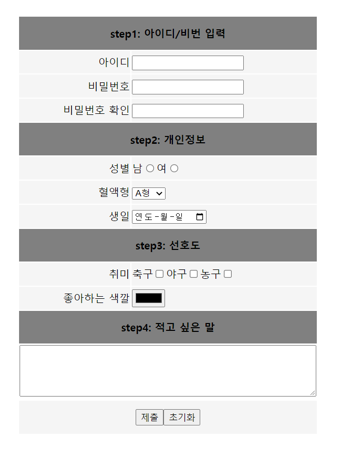
<form action="">
<table align="center" width="400">
<tr height="35" bgcolor="whitesmoke">
<th colspan="2" bgcolor="gray" height="50px">Step1: 아이디 비번입력</th>
</tr>
<tr height="35" bgcolor="whitesmoke">
<td align="right">
아이디
</td>
<td>
<input type="text" name="아이디" value="">
</td>
</tr>
<tr height="35" bgcolor="whitesmoke">
<td align="right">
비밀번호
</td>
<td>
<input type="text" name="비밀번호" value="">
</td>
</tr>
<tr height="35" bgcolor="whitesmoke">
<td align="right">
비밀번호 확인
</td>
<td>
<input type="text" name="비밀번호 확인" value="">
</td>
</tr>
<tr height="35" bgcolor="whitesmoke">
<th colspan="2" bgcolor="gray" height="50px">Step2: 개인정보</th>
</tr>
<tr>
<td align="right">성별</td>
<td>
남<input type="radio" name="남" value="gender">
여<input type="radio" name="여" value="gender">
</td>
</tr>
<tr height="35" bgcolor="whitesmoke">
<td align="right">
혈액형
</td>
<td>
<select name="blood">
<option value="A형">A형</option>
<option value="B형">B형</option>
<option value="O형">O형</option>
<option value="AB형">AB형</option>
</select>
</td>
</tr>
<tr height="35" bgcolor="whitesmoke">
<td align="right">생일</td>
<td>
<input type="date"value="date">
</td>
</tr>
<tr height="35" bgcolor="whitesmoke">
<th colspan="2" bgcolor="gray" height="50px">Step3: 선호도</th>
</tr>
<tr height="35" bgcolor="whitesmoke">
<td align="right">취미</td>
<td>
축구<input type="checkbox" name="취미" value="축구">
야구<input type="checkbox" name="취미" value="야구">
농구<input type="checkbox" name="취미" value="농구">
</td>
</tr>
<tr height="35" bgcolor="whitesmoke">
<td align="right">좋아하는 색깔</td>
<td>
<input type="color" name="color" value="color">
</td>
</tr>
<tr height="35" bgcolor="whitesmoke">
<th colspan="2" bgcolor="gray" height="50px">Step4: 적고 싶은 말</th>
</tr>
<tr height="35" bgcolor="whitesmoke">
<td colspan="2">
<textarea name="" id="" cols="60" rows="5"></textarea>
</td>
</tr>
<tr height="35" bgcolor="whitesmoke">
<td colspan="2" align="center">
<input type="submit" name="제출" value="제출">
<input type="reset" name="초기화" value="초기화">
</td>
</tr>
</table>
</form>
</body>
</html>결과 출력 화면
728x90
'Study > HTML,CSS' 카테고리의 다른 글
| HTML/CSS기초 4일차 공간활용( margin, padding, border) (0) | 2022.10.06 |
|---|---|
| HTML / CSS기초 3일차 <css> (0) | 2022.10.05 |
| HTML/CSS기초 1일차 (1) | 2022.10.01 |